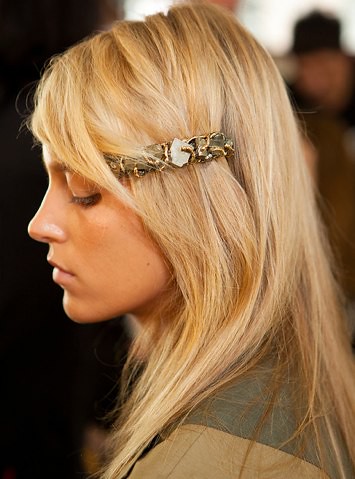
At the moment, I'm in the process of growing out my bangs. Unfortunately, they're currently at the awkward length where they are too long to be bangs and too short to look intentional. I remember seeing the fabulous hair and barrettes at Rodarte's Spring 2011 show awhile back ago and being totally floored. They had such cool, laid-back 70's vibe to them that was so chic at the same time. At the time though, my shorter bangs were not conducive to the deep-part and barrette combo so my fascination fell to the wayside. Fast forward to now. My bangs are both long and driving me crazy. Luckily I remember the Rodarte barrettes and knew they'd be the perfect solution to my hair woes. Aside from the fact that I will sadly never be able to afford anything Rodarte, this was a necessary d.i.y. because I'm fairly positive they were only used for the runway show. Anyway, here's how I made my own version of the barrettes. Mine is not exactly the same since one of the pyrite beads I bought would not thread properly. So I improvised and I'm quite pleased with the results.
RODARTE BARRETTE D.I.Y.
Supplies Needed:
1. A plain barrette. You can get a bag of them at a craft store from between $1-$3 depending on the size. Make sure they have holes on both ends that you can use to secure the wire.
2. Pyrite beads with holes drilled in them, preferably raw. Learned from my mistake and make sure the holes are large enough for the wire. You can also used any other type of bead. This is a very customizable d.i.y.
3. Gold wire. The gauge is up to you but I've found the thicker the wire the less give. This makes it harder to sculpt but it will maintain shape better.
4. Round nose pilers (not pictured). You could do this without them but it would be more tedious and annoy.
Instructions
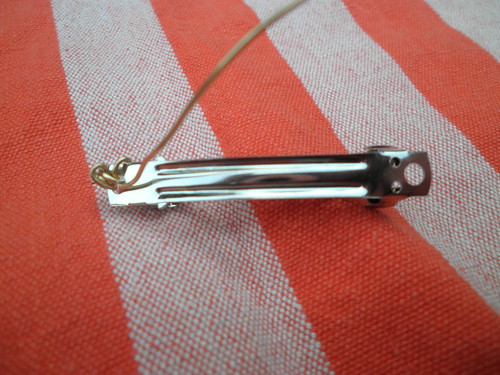
1. Wrap the wire around the whole about three or four times. On the last loop secure the end on the wire by pulling it through past loops. It should look something like this:

2.
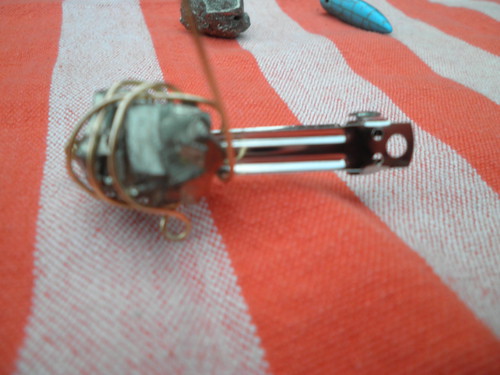
Slide your first bead onto the wire. Push it as close to the end as you can. Wrap the wire about the bead and under the top part of the barrette several times. On your barrette you should be able to see a u-shaped piece of metal under the top piece. Make sure your wire goes between the top piece and the u-shaped piece so you hair will not get tangled with the wire when you wear the barrette. After the first bead the barrette should look somewhat like this:

3.
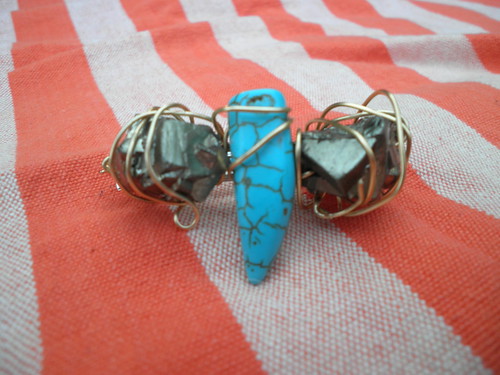
Continue the above step until all beads are secured to the barrette. End your barrette by securing the end of the wire the same way that began the barrette. Here is my end product:

Although the turquoise bead doesn't exactly match the Rodarte version, I'm really pleased with how this turned out. I'm thinking of doing something similar with some druzy beads or maybe some amethyst.


Really neat! I like the turquoise bead and the amethyst would look awesome too.
ReplyDelete-Amber
Just wanted to let you know you've won a blog award!
ReplyDeletehttp://theowlsden.blogspot.com/2011/10/my-first-blog-award-7-things.html
xo Amber P.